Move 6 in detail
Shown below are figures to help you visualize what the steps of Move 6 involve.
I have included these to help readers accustom themselves with the notation system.
|
Move 6: F H-1 F-1 H2 F-1 H-1 F |
||
|
|
|
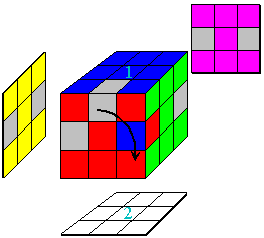
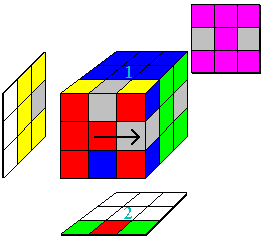
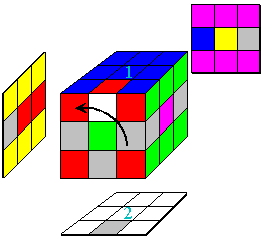
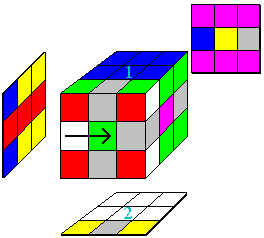
| F: Rotate the front clockwise | H-1: Rotate the middle horizontal slice counterclockwise one turn | |
|
|
|
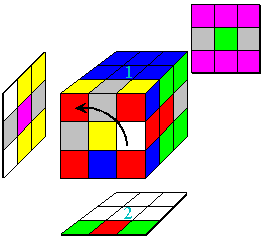
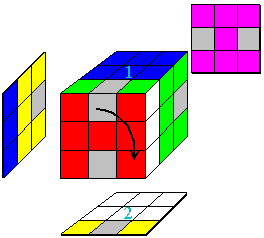
| F-1: Rotate the front counterclockwise | H2: Rotate the horizontal slice twice | |
|
|
|
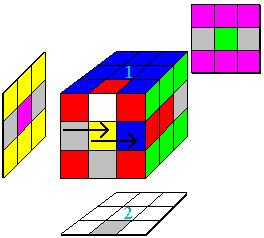
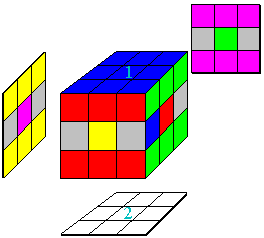
| F-1: Rotate the front counterclockwise | H-1: Rotate the horizontal slice counterclockwise one turn | |
|
|
|
| F: Rotate the front clockwise | The move is complete, and has filled in the keyhole | |