Step 3: Orient the four corner pieces of Side 2
Examine side 2 of the cube. Zero, one, two, three, or even four of the corner pieces will be oriented correctly such that they perfectly line up with their adjacent middle-center pieces. If all four are correct, the cube should look as shown in Figure 8 (below). If not:
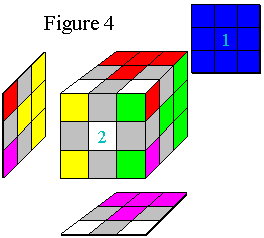
3a. For zero correctly oriented pieces:
|
Position the cube as shown in Figure 4 such that Side 2 is facing you. Perform Move 2, then return to the start of step 3. |
|
Move 2: U-1 F2 U F U-1 F U F2 In words, rotate the upper side (red here) one quarter turn counter-clockwise, then the front side (white here) two quarter turns (half-way around), then the upper side 1/4 turn clockwise, etc. |
|
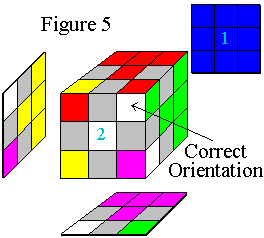
3b. For one correctly oriented piece:
|
Position the cube as shown in Figure 5. Perform Move 2, then return to the start of step 3 only if the four corner pieces of side 2 are not oriented correctly. If they are correct, as shown in Figure 8, go to step 4. |
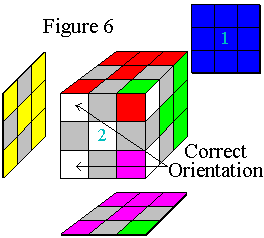
3c. For two correctly oriented pieces:
|
Position the cube as shown in Figure 6. Perform Move 2, then return to the start of step 3. |
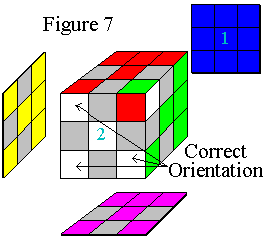
3d. For three correctly oriented pieces:
|
It is not possible to have 7 corners oriented correctly while just one is incorrect. If your cube is in fact like this then it has been disassembled in the past and incorrectly reassembled. You will have to disassemble it again and reassemble correctly. |
|
Step 3 may need to be repeated numerous times. Also, the move directly before all four corner pieces are oriented correctly will have just one piece oriented correctly, as shown in Figure 5 (step 3b)
|
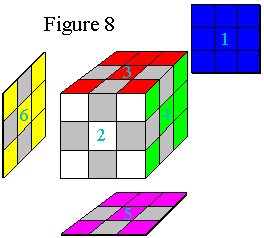
NOTE: To achieve the image shown in Figure 8, the slice containing middle-center pieces 3, 4, 5, and 6 may need to be rotated. Side 2 may also need to be rotated. |